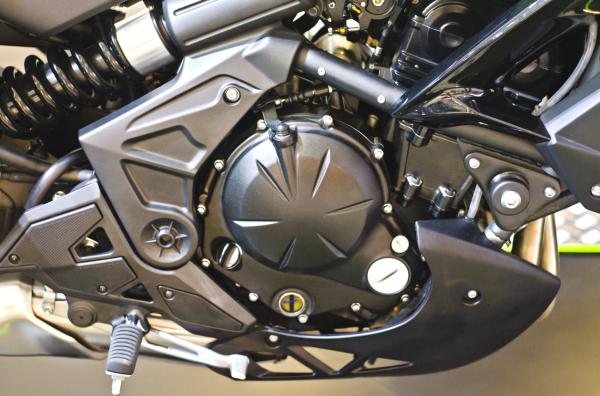
Valves in your motorcycle engine shut and open hundreds of times each minute. Made up of metal, they get hot as you drive and they expand. As a result, the valve seats wear down with time, causing the valves to move up into the aluminum head. This reduces clearance between the cam lobes and the valve stem end, thus affecting the way the valves shut and open. When you buy a new motorcycle, the valve clearance remains steady for the first 80-120 hours, and then starts wearing down. To cope with this, you need to adjust them regularly. If left unattended, the valves will not seat completely, and you will hear valve-train noise more clearly. If you have decided to do that yourself, this oneHOWTO article will tell you how to adjust motorcycle engine valves.
Before we tell you the steps you need to follow in order to adjust motorcycle engine valves, let's take a look at the symptoms that indicate your motorcycle needs valve clearance or adjustment:
- You may hear a knocking type noise in the valve area
- Your motorcycle will start losing power
- The engine is hard to start
- The sound of your motorbike changes
It's crucial to address these symptoms promptly to prevent further damage to the engine. Regular checks will help you maintain optimal performance and avoid costly repairs.
Gather the required tools: Some tools that you would require to adjust your valves include:
- Socket set
- Needle nose pliers
- Screwdriver
- Torque wrench
- Thickness gauge
- Micrometer
Additionally, having a motorcycle repair manual specific to your model can be incredibly helpful. It will provide precise specifications for your engine's valve clearance and torque settings.
Prepare: To prepare for the job, firstly you should know that the motorcycle needs to be completely cold. So make sure you leave your motorcycle in your garage overnight and don't use it before you attempt to adjust the valves.
Remove the valve cover. Use a screwdriver to loosen the bolts of your valve cover and remove its head evenly from every side.
Also, you will have to remove many things from the motorcycle’s valve cover area, so that you can conveniently work with the valves and the camshafts. These include:
- Radiator
- Airbox
- Gas tank
- Tank, mid and upper fairings
- Radiator filler
- Thermostat and hoses
- Coils
- Carburetor
- Coolant and drain oil
- Oil delivery line
- Right down tube
While you remove these parts, it is better to keep clicking photographs, so that you can retrieve them if you happen to forget something. In this regard, organizing the removed parts in a systematic manner will also help make reassembly easier.

Measure the clearance: After removing the cover, you will be able to see the camchain and the camshafts. Now turn the alternator anti-clockwise after removing the alternator cover. You will be able to see a ‘T’ near the crankcase line. Now you have to measure four clearances for the piston’s valves. Try with the minimal clearance feeler gauge and work until you identify the one that just doesn’t go in. The clearance you want is the one less than this one. Make a table of all the measurements. Once you have measured your first piston, do it with other pistons too by rotating them 180 degrees in clockwise direction.
Accurate measurements are essential. It should be noted that incorrect clearances can lead to reduced engine efficiency and increased wear and tear. This step ensures that you have precise data to work with, which is critical for the adjustment process.
Make adjustments: Remove the camshafts, camchain guides, camchain tensioner, and camshaft caps until you see the buckets or valve lifters. You will find a shim under each of these. Pull off all the lifters that you want to replace. Lay them on a paper sheet along with their shims, and note their size so that you can get a replacement for them. If you are not sure of their size, you can use a micrometer to measure their thickness. Apply some assembly oil or moly grease on the new shims, put them back in the engine, and cover with the lifters that you earlier removed.
This part of the process is delicate, as incorrect handling of components can cause damage. Always handle shims and lifters carefully to ensure they remain in optimal condition for reuse.

Put them back together: Take help of your pictures and put everything back to its place. Put back the camshafts, install the chain back over them, line up the markers with camshaft caps, tighten up the caps, push down the camchain between two sprockets, slowly rotate the alternator and make sure that everything is lined up. Now, reinstall the tensioner and make sure that all of them are perfectly done.
Reassembly requires attention to detail. Ensure every component is secured firmly in its place to avoid any issues when you start the engine.
Finalize: Finally, reinstall the alternator and the valve cover. You may consider replacing the old rubber bushing and bolts with new ones, and also refilling the coolant and the drained oil. As you have already removed your coolant, it’s the right time to do a coolant flush as well. Now, start the motorcycle and enjoy a better ride than before.
Make sure you keep up with your motorcycle's maintenance as, if you leave valves un-adjusted it could cause serious and costly problems. Regular maintenance ensures longevity and reliability of your motorcycle, providing a smoother and more efficient ride.
If you want to read similar articles to How to Adjust Motorcycle Engine Valves, we recommend you visit our Motorbike Maintance and Repair category.